Leaking Shower Remodel in Orlando, FL — Before & After
See how Cavalieri Flooring renovated an Orlando shower after a
second-floor water leak damaged the level below, with waterproofing,
custom tile work, and a complete before-and-after transformation.
ResidentialBathroom Remodel12×24 TileOrlando, FL
Project Overview
Bathroom remodels are among the highest-ROI home improvement
projects, consistently delivering strong returns in Florida's
competitive real estate market. But beyond the financial return, a
well-executed bathroom transformation changes how a homeowner
feels about their home every single day — turning a dated,
frustrating space into a clean, functional, and beautiful room
that sets the tone for the morning.
This Orlando homeowner came to Cavalieri Flooring with a bathroom
that had seen better days: original tile with discolored grout, a
dated layout, and surfaces that had started to show moisture
damage around the shower transition area. They wanted a complete
transformation — new tile floor throughout, fresh wall tile, and a
clean modern aesthetic that would feel like a new bathroom from
the ground up.
5 DaysProject duration
$7,000Price for this project
12×24Tile format
32829Orlando project ZIP code
This was a full bathroom remodel completed in five days for
$7,000. The installation used large-format 12×24 tile,
Durock cement board, and a dedicated waterproofing system for the
shower and other wet areas. The project was completed in Orlando,
Florida 32829, with the goal of correcting the leaking shower and
delivering a durable, finished bathroom rather than applying a
surface-level cosmetic patch.
Project Challenges
The homeowner contacted Cavalieri Flooring after a serious leak
developed in her second-floor bathroom. Water from the damaged shower
had leaked through the floor and affected the first level of the home,
making the renovation an urgent priority. The main challenge was
providing a fast scheduling process so our team could inspect the
damage, stop the source of the leak, and begin the shower renovation as
quickly as possible.
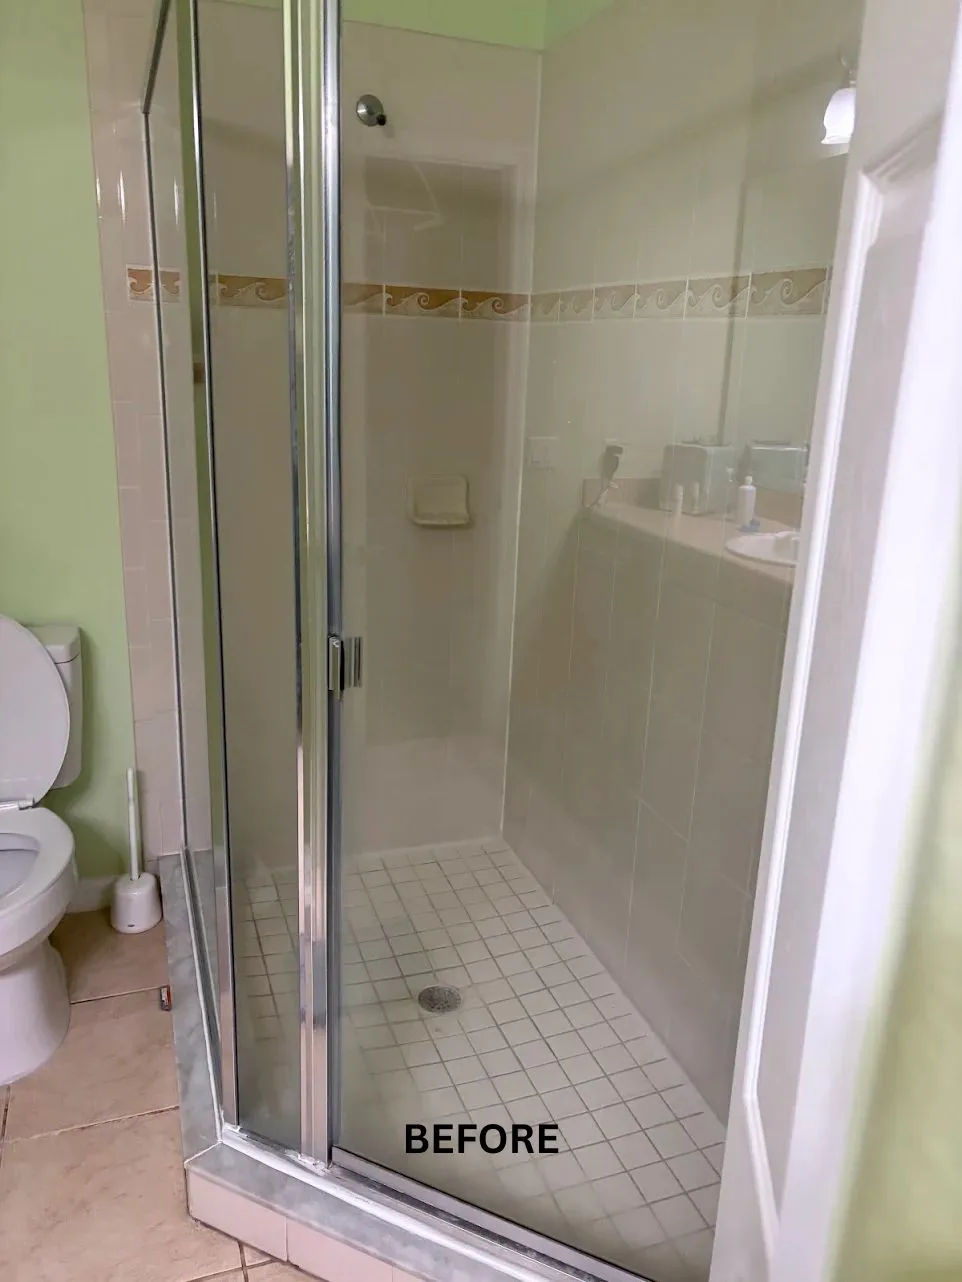
Before — Shower Before Renovation
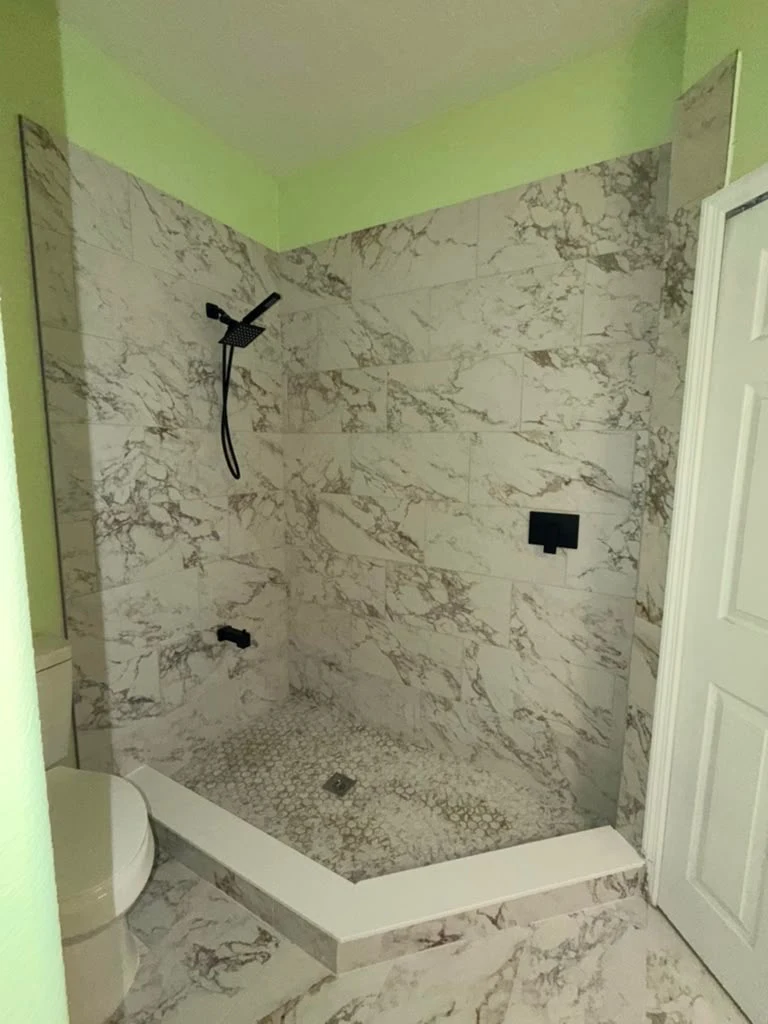
After — Full Tile Renovation
Key challenges included:
Water leaking from the second-floor bathroom to the first floor
A damaged shower that required complete renovation
The need to identify and correct the source of the leak
Preventing additional water damage to the home
Providing fast scheduling and a quick project turnaround
Restoring the bathroom with a durable and properly waterproofed
shower system
The Challenge: Waterproofing, Flatness, and Precision Tile Work
Bathrooms are the most demanding environment in any home for flooring
and tile work — and
Florida's year-round humidity and heat
make the margin for error even smaller. The combination of standing
water, steam, temperature cycling, and daily cleaning creates conditions
that will expose any shortcut in installation technique within months.
The technical installation challenges on this project included:
Existing moisture damage: The inspection revealed
minor moisture intrusion behind the existing shower wall tile from a
previous installation that lacked proper waterproofing. Before any new
tile could go in, the damaged backer material needed to be removed and
replaced, and proper waterproofing membrane applied to all wet-area
surfaces.
Subfloor flatness: The bathroom subfloor had a slight
bow across the center — common in older homes where the subfloor has
deflected slightly over time. Large-format tile requires a flat
substrate within 1/8 inch over 10 feet to prevent lippage and
cracking; the floor needed leveling compound to bring it within spec
before tile installation.
Layout planning for a small space: Bathrooms amplify
layout errors — a slightly off-center tile pattern or poorly placed
cuts are immediately visible in a compact space. The tile layout had
to be planned carefully to maintain symmetry at the focal points and
avoid small, awkward cut pieces at the perimeter.
Transition to adjacent flooring: The bathroom door
threshold needed a clean, flush transition to the adjacent hallway
flooring — a detail that's easy to do poorly and immediately visible
when done wrong.
Our Approach: Build It Right from the Ground Up
We began by removing all existing tile, exposing the subfloor and wall
substrate completely. This full demo approach — rather than tiling over
existing tile — allowed us to inspect and address every issue before it
was buried under new material. The damaged backer board sections were
removed and replaced with moisture-resistant cement board, and a
waterproof membrane was applied to all shower and wet-area surfaces
before any tile was set.
Subfloor leveling compound was applied to the low areas of the bathroom
floor and allowed to cure fully before tiling began. A fresh, flat
substrate is the foundation of any quality tile installation — rushing
this step invariably creates problems down the road. It is also one of
the key reasons
professional installation consistently delivers results that DIY
cannot.
The tile layout was planned from the center of the floor out, with the
primary sightline from the bathroom door prioritized for full tiles.
Wall tile was laid from the horizontal datum line established with a
level chalk line, ensuring perfectly level courses throughout the
vertical surface. Grout joint spacing was maintained consistently with
plastic spacers throughout.
The selected large-format 12×24 tile with a clean
neutral tone was installed throughout the floor and shower walls,
creating visual continuity between the floor and shower surfaces that
makes the space feel larger and more cohesive. Rectified edges on the
tiles allowed for minimal grout joints, reducing maintenance surfaces
and creating a cleaner, more contemporary look.
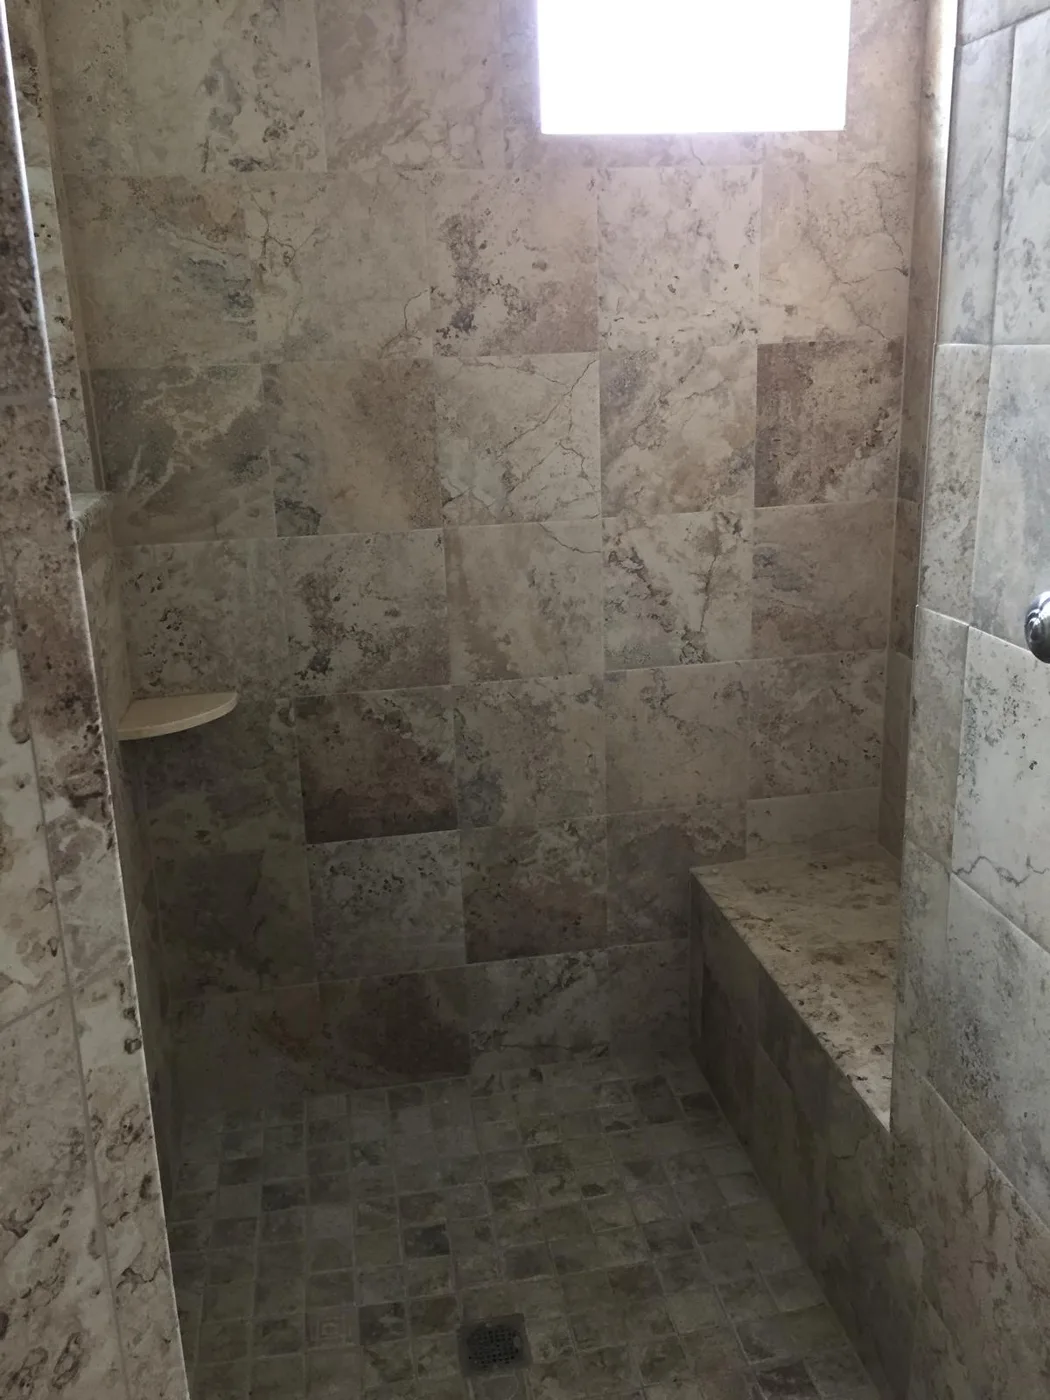
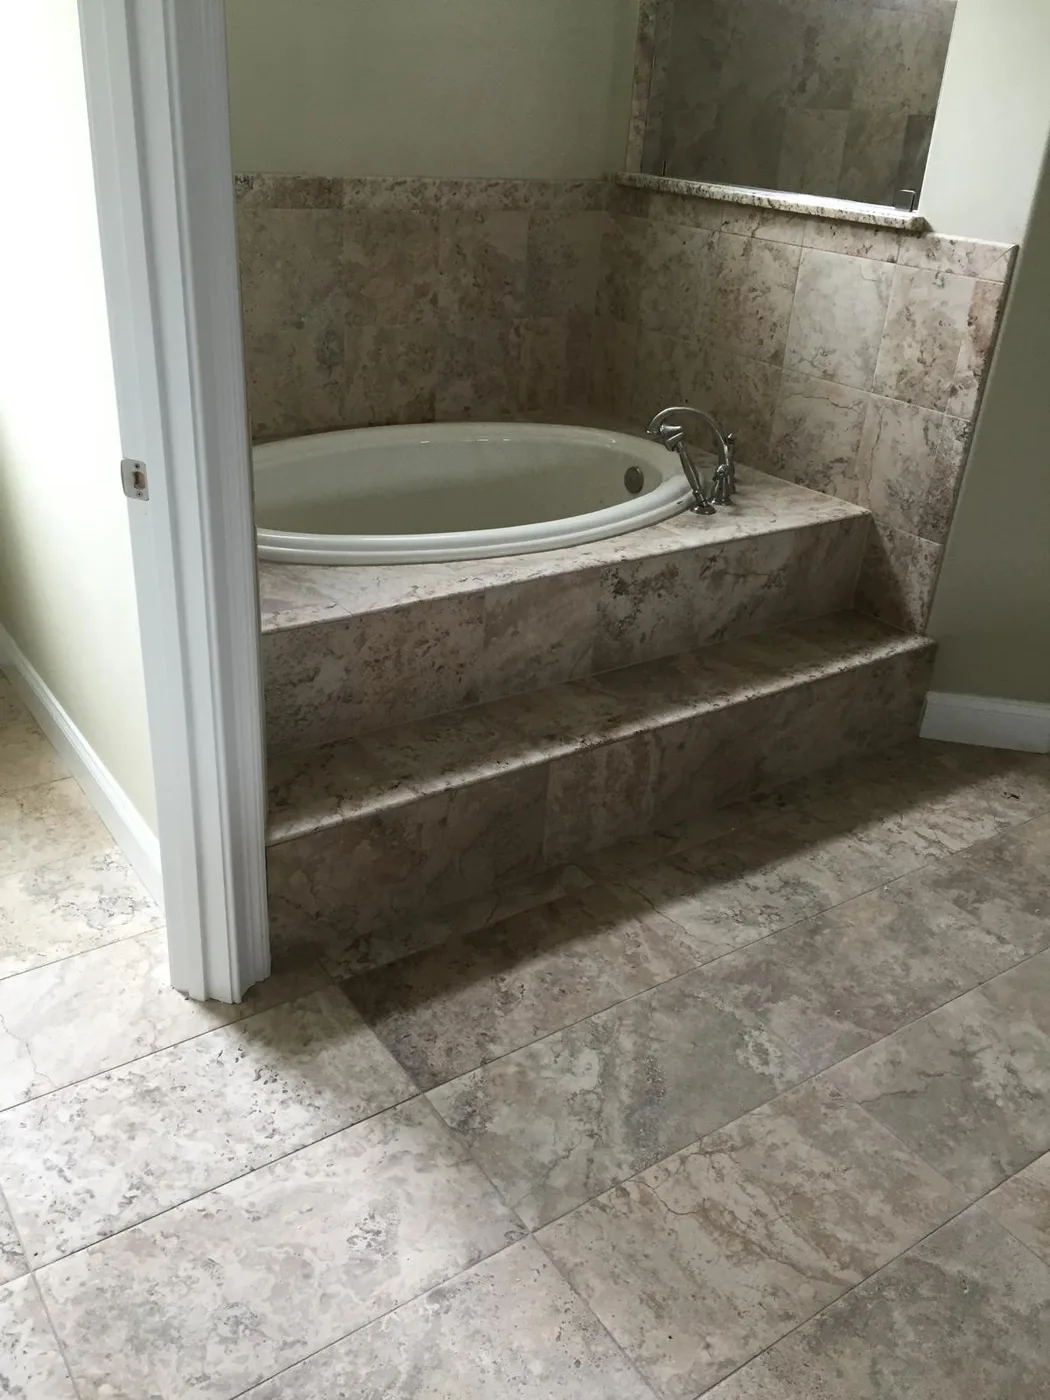
Additional Large-Format Tile Detail
Additional 12×24 Tile Detail
Results: A Bathroom That Feels Brand New
The finished bathroom exceeded the homeowner's expectations — the
continuous tile tone across the floor and shower walls created a
seamless, spa-like aesthetic, and the large-format tiles with minimal
grout lines made the compact space feel noticeably more open. The fresh
waterproofing behind the shower walls ensures there will be no repeat of
the moisture damage that plagued the previous installation. Porcelain
large-format tile is also one of the
most durable flooring choices for high-traffic and wet areas, making it the right long-term material for a shower that sees daily
use.
Clean, precise grout lines, perfectly level wall tile, and flush
threshold transitions completed a bathroom that looks and functions as
if it was designed this way from the beginning.
Full demo and subfloor/substrate prep before any tile installed
Waterproof membrane applied to all wet-area surfaces
Large-format 12×24 tile — floor through shower walls
Rectified tiles with minimal grout joints for clean look
Symmetrical layout from center with no small cut pieces at focal
points
Cavalieri Flooring provides
professional bathroom remodeling in Orlando, including shower renovations, waterproofing, tile installation, and
complete bathroom transformations.
Completed bathroom remodel with finished tile installation.
Frequently Asked Questions
Porcelain tile is commonly recommended for bathroom applications
because it has a very low water-absorption rate of 0.5% or less when
properly classified and tested.
A typical full bathroom remodel — including demo, tile floor, wall
tile, and fixture work — takes 5 to 10 business days depending on the
size of the space, the complexity of the tile work, and the scope of
plumbing or other trade work involved. Custom tile patterns,
large-format tiles, or highly detailed mosaic work may add time.
Cavalieri Flooring works efficiently to minimize the time your
bathroom is out of service.
Yes — for any tiled shower or wet-area wall, a waterproof membrane is
essential. Without proper waterproofing behind the tile, water vapor
and occasional moisture intrusion will eventually damage the backer
board and wall framing, leading to mold, structural damage, and
eventual tile failure. We apply code-compliant waterproofing to all
shower and wet-area surfaces before any tile is installed. If you want
to know what to watch for before it reaches this stage, read our guide on
Signs Your Shower Is Leaking Behind the Tile. For a full explanation of how a proper waterproofing system is built, see
How Shower Waterproofing Works.
For bathroom applications, we typically recommend epoxy grout or
high-quality polymer-modified cement grout with a penetrating sealer
applied afterward. Epoxy grout is highly stain-resistant and easier to
maintain. For floor grout joints in wet areas, we always use unsanded
grout for joints under 1/8 inch and sanded for wider joints, with
grout color chosen to complement the tile and minimize visible dirt
accumulation.
Yes. We handle full bathroom remodels including tile floor and wall
installation, shower tile, niche and bench work, and all associated
flooring scopes throughout Orlando and Central Florida. Contact us for
a free in-home estimate and bathroom remodel consultation.
Established in 2015, Cavalieri Flooring LLC is an active Florida
limited liability company serving homeowners and businesses
throughout Orlando and Central Florida. Locally owned and operated
by Gustavo Cavalieri, Cavalieri Flooring brings practical
installation experience, detailed waterproofing work, and
accountable project communication to bathroom renovations like this
one.